Unlocked Mind Newsletter / Unlocked Mind Media
3 dimensional visualization skills are important to develop the imagination, so a good way to develop this ability is to build and work with three dimensional things. Here we share the various projects our staff have done.
It is our hope that you will see the logic (or the lack of logic) used to make the Jack Benny dryer as an example of the kind of thought and analysis that goes into our script review services.
Notice: The content presented here is for entertainment purposes only. Readers who decide to construct the items mentioned here do so at their own risk and peril.
Most people would never think of making their own coin operated dryer. Everyone would simply go out and buy one instead of making one. Everyone except Jack Benny, the famous Hollywood comedy movie star famous for being known as a cheapskate. Back in the good old days of the Great Depression, people had to use their creativity and ingenuity to make the things they needed, either because the item cost a lot of money ("What? $600.00 for a coin operated dryer?"), or because people were too cheap to buy the item, or they did not want to pay the high price for it ("Rochester, we're going to build our own coin-operated dryer!"). Because only someone like someone like Jack Benny would be cheap enough, or determined enough to go through the trouble of making his own coin operated dryer, we have called this DIY coin operated dryer the Jack Benny dryer.
How to build your own coin operated Jack Benny dryer
Are you tired of having free loading house guests or your grown kids coming to your house to do their laundry? Maybe you own an apartment building, and you want to make your tenants pay to use the dryer, to help cover high utility expenditures. Well ... with your own coin operated dryer, if no money is put in, the dryer won't work ... just like the dryers in a real coin operated laundry!
Here is what you will need to get started:
1. Dryer with a basic mechanical timer. The fancy new dryers with push button digital timers and complex electronic controls are too much trouble for script writers with little or no electronics experience to deal with. Don't forget to read the disclaimer above. If you get a bee in your bonnet and decide to build this contraption, you are doing it at your own risk. Electric current, even ordinary 120 volt house current can be deadly. If you don't don't know what you are doing, don't even think of actually making this thing, but instead read along to follow the logical pattern of how the dryer was constructed, if that is even possible.
The dryer used here is a 120 volt gas-fired dryer. An electric dryer could be converted, but be aware that electric dryers usually run on 240 volts, and require different timers that run on the higher voltage.
2. Greenwald, or ESD mechanical coin slide. This is the brains of the coin operated dryer. This is the thing that accepts the coins, and activates the dryer timer.
3. Greenwald coin operated dryer timer. Don't confuse a regular dryer timer with a coin operated dryer timer. They are two different timers. The coin operated timer will have a special lever on it that works with the coin slide. Greenwald timers are known around the world for their quality and reliability, so use other brands at your own risk. The Greenwald website also has extensive reference materials to read, even if you get the timer used. The coin operated timer is an electro-mechanical timer/switch device that once activated by the coin slide, counts off a measured amount of time, usually 30, 45 or 60 minutes, allowing the dryer to run for set amount of time. See setting the timer below for more details.
4. Some scrap 3/4 inch plywood. This will be used to build your very own meter box, to house the coin slide and the timer, and allow the coins to be collected. Having a coin operated dryer is no good if people can activate the timer or take the coins, which is why the meter box will need a lockable access door.
5. Miscellaneous stuff. For the access door, you will need a small hinge, a cabinet lock, or a padlock and double acting padlock hasp to keep the meter box locked. Keeping the meter box locked is important, since you don't want people to get shocked by the exposed wires on the timer switch, tampering with the timer or taking the coins out.
Note about part sources: The parts used in this project are quite specialized, so don't expect to find them at most flea markets or swap meets. You will have better luck checking on Ebay.com, and searching for 'coin dryer timer' 'coinslide' 'coinchute' and if someone is really bad at spelling, 'coinshoot' (I didn't know the coin slide shoots the coins out). The parts used to make this DIY coin dryer only cost about $30.00. $20.00 for the coin slide, and $10.00 for a used timer, which is much cheaper than spending $500.00 and up for a brand new coin-op dryer.
You will also need some wire capable of handling 120 volt house current, electrical tape, wire nuts, soldering iron to connect the timer, various screws, nuts and bolts to put everything together so it stays together. Chewing gum and bailing wire is not recommended for this project. You will also need various tools to cut and drill the plywood and metal on the dryer to install the meter box.
Let's get started:
Step 1. Getting the dryer ready. Chances are, if you decide to build this project, you will use an old dryer instead of buying a brand new one, especially if you think the misses will have a heart attack if you start pulling a brand new dryer apart!
If you don't have a used dryer laying around, check around for a free or used one. Let your boss at work know you are interested in building your own coin-operated dryer, and that you need an old dryer really bad. Of course, if none of your friends or family has an old dryer just laying around, you can try stopping people on the street and asking them if they have an old dryer they don't need anymore, or you can check Craigslist.com for free or low cost appliances like dryers. This may be your best option if you don't want to make a pest of yourself asking people if they have an old dryer laying around, or thinking you are crazy.
Once you get the dryer, make sure it works. For this project, run the dryer on the timer setting, and not any of the moisture/dryness settings. Since you DON'T want to by-pass the temperature selector (which controls the gas burner) or start button, the dryer has to work with the timer setting. If it dos not, continue your search until you find one that does.
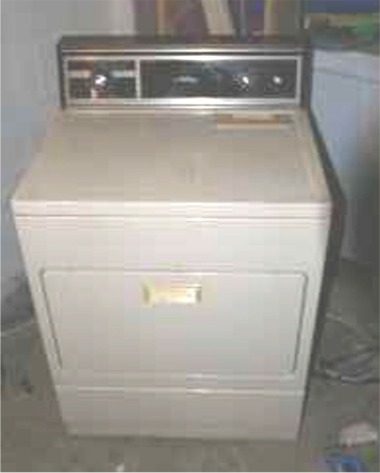
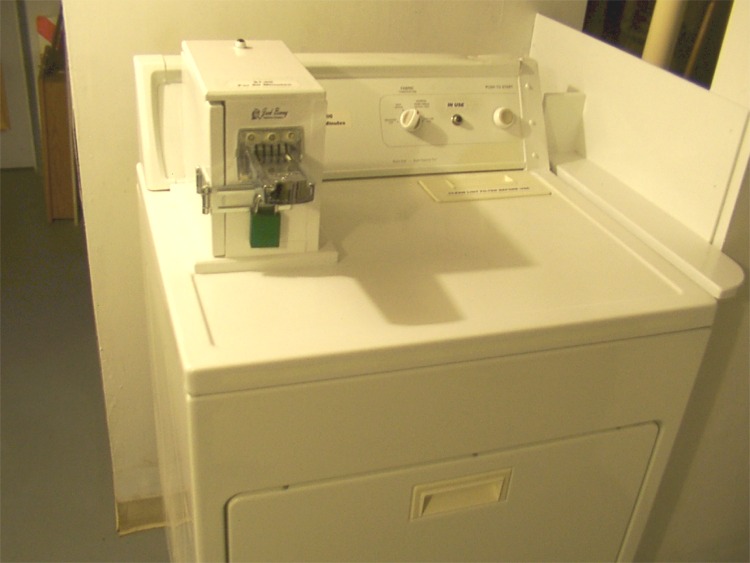
The victim: Dryer ready for conversion
Once you have a dryer that works on the timer setting, unplug the power cord from the wall. You are now ready to take it apart. Since various dryers have different access panels and ways to open them up, I will let you worry about how you open up your own dryer. In some cases, companies use special security screws to keep crazy people from opening them up, and doing crazy things like modifying them like this. Remember, converting a new dryer like this would immediately void the warranty ... No wonder the missus would be upset!
Once you have access to the wiring. you are ready for the next step. With the dryer timer set in the timing zone, pull the knob off the timer, and remove the whole timing switch. Next, only remove the remove the power wires from the timer motor as well.
Important: Don't cut or remove any of the other wires from the timer switch, since these are connected to the control circuits for the door interlock, and the burner/temperature controller. You are going to leave the old timer assembly inside the dryer. Use the electrical tape to cover the terminals on the disconnected timer power wires, and also secure them inside the dryer. Finally, plug the dryer back in. If you press the start button, the dryer should start running and not stop running until you open the door, or pull the plug from the wall. Remember, you don't want to by-pass the important safety features the manufacturer designed and installed in the dryer like the door switch and temperature overload switches in the dryer, and more importantly, the regulator for the gas burner. You just want the dryer to stay in its original timer mode permanently.
Step 2. Now that you know the dryer will work for this purpose, you have to decide where to put the meter box. If you plan to put the dryer in actual use to collect revenue from the public, you may want to buy a real metal coin operated meter case, or if you are good at welding, to build a metal meter case. The cheap wooden meter box shown here would easily be smashed to pieces with one good swing of a baseball bat. Also note the location of the lint filter on the dryer. If the lint filter is on the top of the dryer, you don't want to install the meter case/box over the lint filter door, unless you want the dryer to get clogged up with lint. In this case, expect to mount the meter box on the opposite side of the dryer.
Of course, you can also use armored cable and connectors to mount the meter box on the wall away from the dryer, too. This option would be good if you go through dryers like water. The armored cable from the meter case can easily be connected to 'new' dryers as needed.
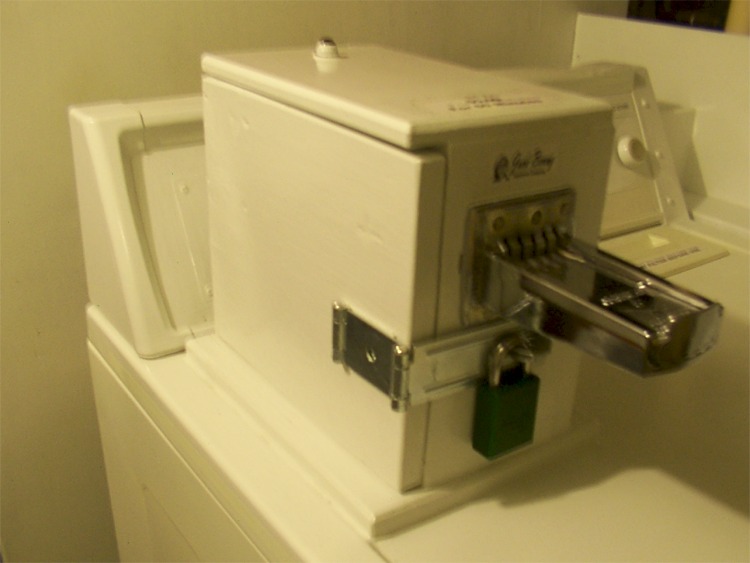
The DIY dryer meter case
Step 3. Build the meter box. This step is harder than it looks, because you have to make sure the coin slide is able to activate the timer switch correctly. Start by cutting a hole in the meter box to install the coin slide FIRST, so once the coin slide is installed, you can adjust the timer to work with the coin slide later. Since the coin slide is exposed, and expected to be used by people, it is important that it is securely installed.
Next, adjust the timer by putting coins in the coin slide, and sliding the coin slide all the way in, as it would be used. Mark this point so you know where to locate the lever of the timing switch, as shown in the picture. While holding the coin slide all the way in, move the timer lever up to the end of the coin slide until it is triggered, or the lever causes the switch terminals to close. Mark this spot. This is where the timer must be installed. Let go of the coinslide, while holding the timer in place with one hand, and use your free hand to mark the spot where the timer goes. Since the timers usually have elongated screw mounting holes, put the screws in the middle of the mounting slots so the timer can be better adjusted later on.
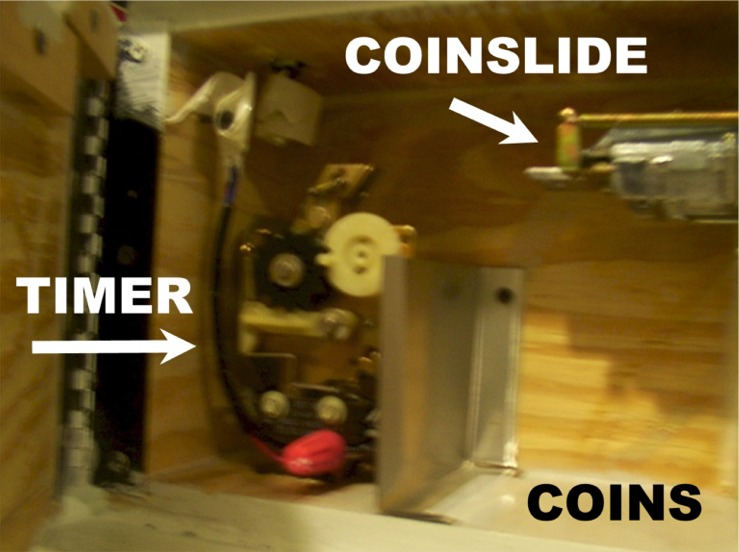
Inside the meter case: The timer and Coinslide
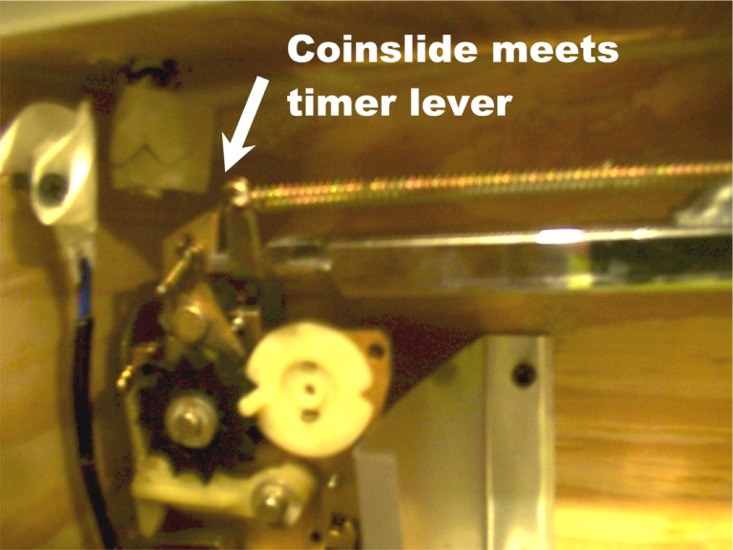
Close-up of the coinslide meeting the timer lever
Now Before you actually install the meter box, you should first wire the coin-op timer into the dryer. Since dryer timers vary, how they are connected to the line power and the dryer also varies. Check your timer model to see how it should be wired. If you have a Greenwald timer, their website has wiring diagrams available for free download (based on the part number), otherwise good luck. Sorry, can't help you here.
Note: When connecting the new coin operated timer to the dryer, make sure it will always get power from the power cord. If the timer shuts off the line power when the cycle is complete, the timer would have to be reset by hand to get it working again. The new timer switch is simply spliced into the dryer power line, so the dryer will only run through the new coin operated timer, or I should say, only if the user pays to run the dryer. Let me grind this into your skull again: when the dryer is running off the coin-op timer, it is running in its original timer mode.
Step 4. Making it look good. Once everything is working right, you can install the meter box, and paint it so it looks better. You may also want to cover up the hole where the original timer was installed, so no one will be wondering what the hole is for, or sticking their fingers into the hole. Also secure any wires inside the dryer so they don't touch the spinning drum. The wires for this dryer were run through a hole in the top corner of the dryer, just inches away from the drum.
The finished DIY Coin operated Dryer
Optional: Just like the dryers in a real coin laundry, you may want to install an 'in use' light. Use a 120 volt panel light and wire it to run with the dryer, so the light stays lit as long as the timer is running.
Setting the timer: Most mechanical Greenwald dryer timers use a special plastic cog wheel to determine the running running time. (the timing wheel is the round white plastic wheel on the timer in the picture). Based on the timer motor speed, different cogs with different numbers of cogs, or pins on the wheel will allow the dryer to run longer or shorter times than others. Before you install your dryer timer, make a note of the timer speed for future reference, since changing the timing wheel is easier than trying to read the motor speed once the timer is installed. However, if you don't know the motor speed, it can be determined by the number of pins on the timing wheel and seeing how long the timer runs. If you don't want to stand around the dryer, hook up an electric analog clock set to 12:00, and let the timer run the clock. You will see the amount of elapsed time when the clock stops after the timer stops running. A digital won't work when the power turns off.
Of course, to help take the confusion out of setting the timer, companies like Greenwald have charts based on the type of timing cog wheel and motor speed combination so you will know how long the timer will run, and thus how many quarters you should set the coin slide for to activate the dryer. For example, if you know the dryer will run for 60 minutes, you will want to set the coin slide for at least 4 quarters to recapture the high cost of natural gas and/or electricity it would cost to run the dryer, and maybe make a small profit, just like they do in a real coin laundry!
See the Jack Benny Dryer working on YouTube!